
My loves, this will be a long post, and possibly a post that is not for you, but it could be useful to someone you know. If that is the case, please pass it on to them.
You may have read before about us offering binders to trans masculine and non-binary community members. We've been working on improving our patterns in the background for a year or so and we have one that we are very happy with. We make it in three levels of compression. We are releasing the pattern for our most sturdy binder for free. We feel that this is a binder is safe and comfortable to wear and not too sweaty.
My hope is that those with crafty parents, grandparents, friends, or a diy spirit will have a starting point for making their own safe and affordable binders. This pattern is free and I would encourage people to make binders for others, if you want to sell the binders themselves, go ahead. I hope that you will share the pattern with anyone who asks.
This blog post will serve as my first pass at instructions for the construction of the binder. The pattern is available for free here: https://ureshiidesign.ca/binder-free-sewing-pattern-download/. When you check out with this listing it will not ask for payment, but it will ask for your billing address, we will not use it.
If you would like us to make one for you you can order it here: https://ureshiidesign.ca/crop-tank/ Choose "Everyday Jersey" in the colour of your choice, and "V-Neck binder"
The fabrics we use are a 66% bamboo / 28% cotton / 6% spandex jersey (Weight: 200 gsm / 5.9 oz.sq yd) You could use other rayon/spandex fabrics such as 95% bamboo 5% spandex in a similar weight for similar results.
The second fabric is a "power mesh" that is not super powerful. The one we are using is 83% Nylon / 17% Spandex. (Weight: 165 gsm / 4.9 oz.sq yd) It has some drape and significantly more stretch in one direction. It is not as stiff as what is seen in shapewear, more like something that would be used to put sheer panels in leggings or tops.
From here on out is the instruction portion of the post. This is my first attempt, your frustrated messages will (I assume) lead to edits and improvements. I will also post a youtube video soon, and post it HERE.
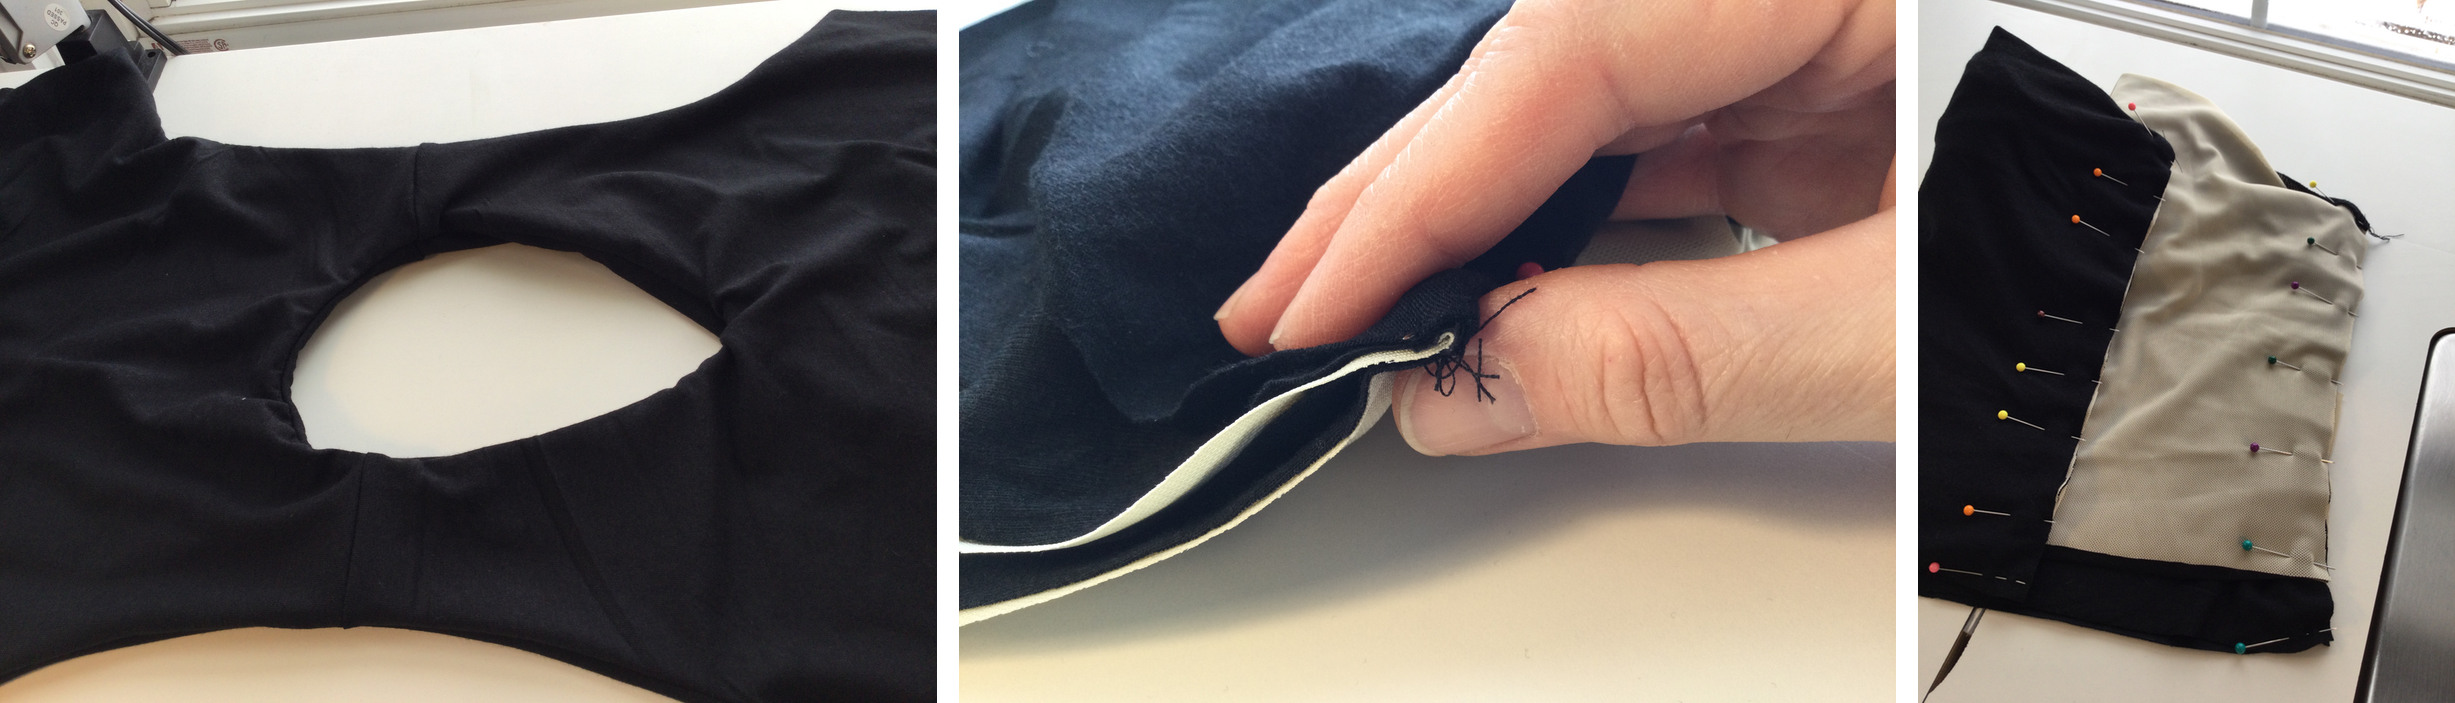
I just discovered that the photos to go along with this post are of an earlier version of this binder. The stable layer topstitched on in the first step is not shown. Don't panic.
1) Print, assemble, and cut out your pattern pieces. Cut your fabric pieces paying particular attention to the direction of the greatest stretch.
2) Place your mesh "stable layer" pieces over their corresponding mesh "underlays" matching up at the armpits. Pin your stable layer to your mesh underlay and use a zig zag or three step zig zag to topstitch along the top and bottom of the stable layer. If you are having trouble with stitch formation, make sure you are using a new "universal" needle, or if you are still having trouble try smaller size or a microtex/sharp needle in one of the smaller sizes.

3) Place your overlay pieces right sides together and stitch the shoulder seams. Place your underlay (jersey) pieces right sides together. Place your mesh underlays on either sides of your jersey underlays, necklines matching. Stitch the shoulder seams of all underlays together. (4 layers)

4) Open up your overlays and lay them out so that right sides are facing up. Open up your underlays at the shoulder and lay them on top of your overlays right sides of the jersey fabric facing down. Your mesh underlays should be on top. Stitch around your neckline.

5) Flip your binder so that the whole garment is right sides out, laid out as before. Take the outer shoulder seams from one side and wrap them around the opposite shoulder. This will mean that you have one unsewn armhole inside the other armhole/shoulder. Pin from armpit to armpit on the outer side and stitch all layers. After you've done this, pulling the wrapped armpit out of the completed one will result in your right sides out binder laid flat, with one finished armhole. Now take the unfinished armhole and wrap the shoulder seams around the finished side. Pin from armpit to armpit and stitch. Pull through and do a happy dance. I hope. It might be better to just watch this part on video a few times!
6) Pinch the armpits of one side together to complete the armhole. Find your jersey overlays, they are one inch longer, make sure they are right sides together. Fold them to one side of the armpit and all other layers to the other side. Pin and fold at the armpit fold taking care to arrange your seam allowances as best you can. At the hem of your top pin the bottoms of the outerlays together. Pin the bottoms of your underlays to the overlays one inch from the bottom. Pin along both side seams distributing any weird fullness as evenly as possible. Be sure to either backstitch or leave serger tails at the armpit to pull in later. I find it easier to start at the armpit and stitch downwards toward the hem.

7) Flip your binder so that right sides are out. Fold your overlay one inch up over your underlays and stitch the hem. Use a coverstitch, zig zag, or three step zig zag to maintain stretch
8) Use a bar tack to secure your binder underarms, this will be the main stress point in the garment.
9) Either put it on and do a happy dance, or put it on and try not to be mortified that it is so wrong. You may prefer to go up or down a size, or change some element that doesn't work for you. This is hard, take the next step. Once you have the perfect garment in your hands it will have been worth it.
Notes: I am very privileged to have the three machines I'll be using in the youtube video and in these instructions. If you only have a home sewing machine you should be able to complete all of these steps with a zig zag or stretch stitch. It is never a waste of time to try a few different stitches on scraps and haul on them to see if the stitches hold.
I will make further videos with more limited machines to demonstrate the options.
We don't tend to make standard sizes for any garments over a certain size, we always draft to measurements from there out. If you need a larger size than what we have available here, please fill in our measurement form and I will custom draft something for you. I will share the pattern here with notes on the sizing and preferences. In this way we can build a library of plus sized options, and possibly learn something.
Feel free to get in touch if there is something missing here, I'm proud of you for even reading this far.
-Emily